Wednesday, March 31, 2010

Monday, March 29, 2010

I want this - Bacon Bouquet


Saw this posted on a friend's page - from *this is why you're fat*

disregarding where it's from, i'm pretty sure i'd squeal (pun intended) with excitement if i received this bouquet!

Parisian Macaron obsession strengthens...


seriously, i am not quite sure what my issue is, but i am clearlllllyyyy obsessed with these little treats!

some more pictures of this weekends adventures with parisian macarons!

flavors (in order. disregard the complete lack of planning for color choices): plain almond, pistachio (delish!), and coconut (could barely taste it, next time using coconut extract instead of vanilla extract...mmm coconutttttt!)

the whole tray that i made for my grandma's 75th birthday - there were plenty more but i ran out of buttercream. i am NEVER prepared enough, it's ridiculous.

Lavender Cupcakes with Citrus Cream Cheese Icing

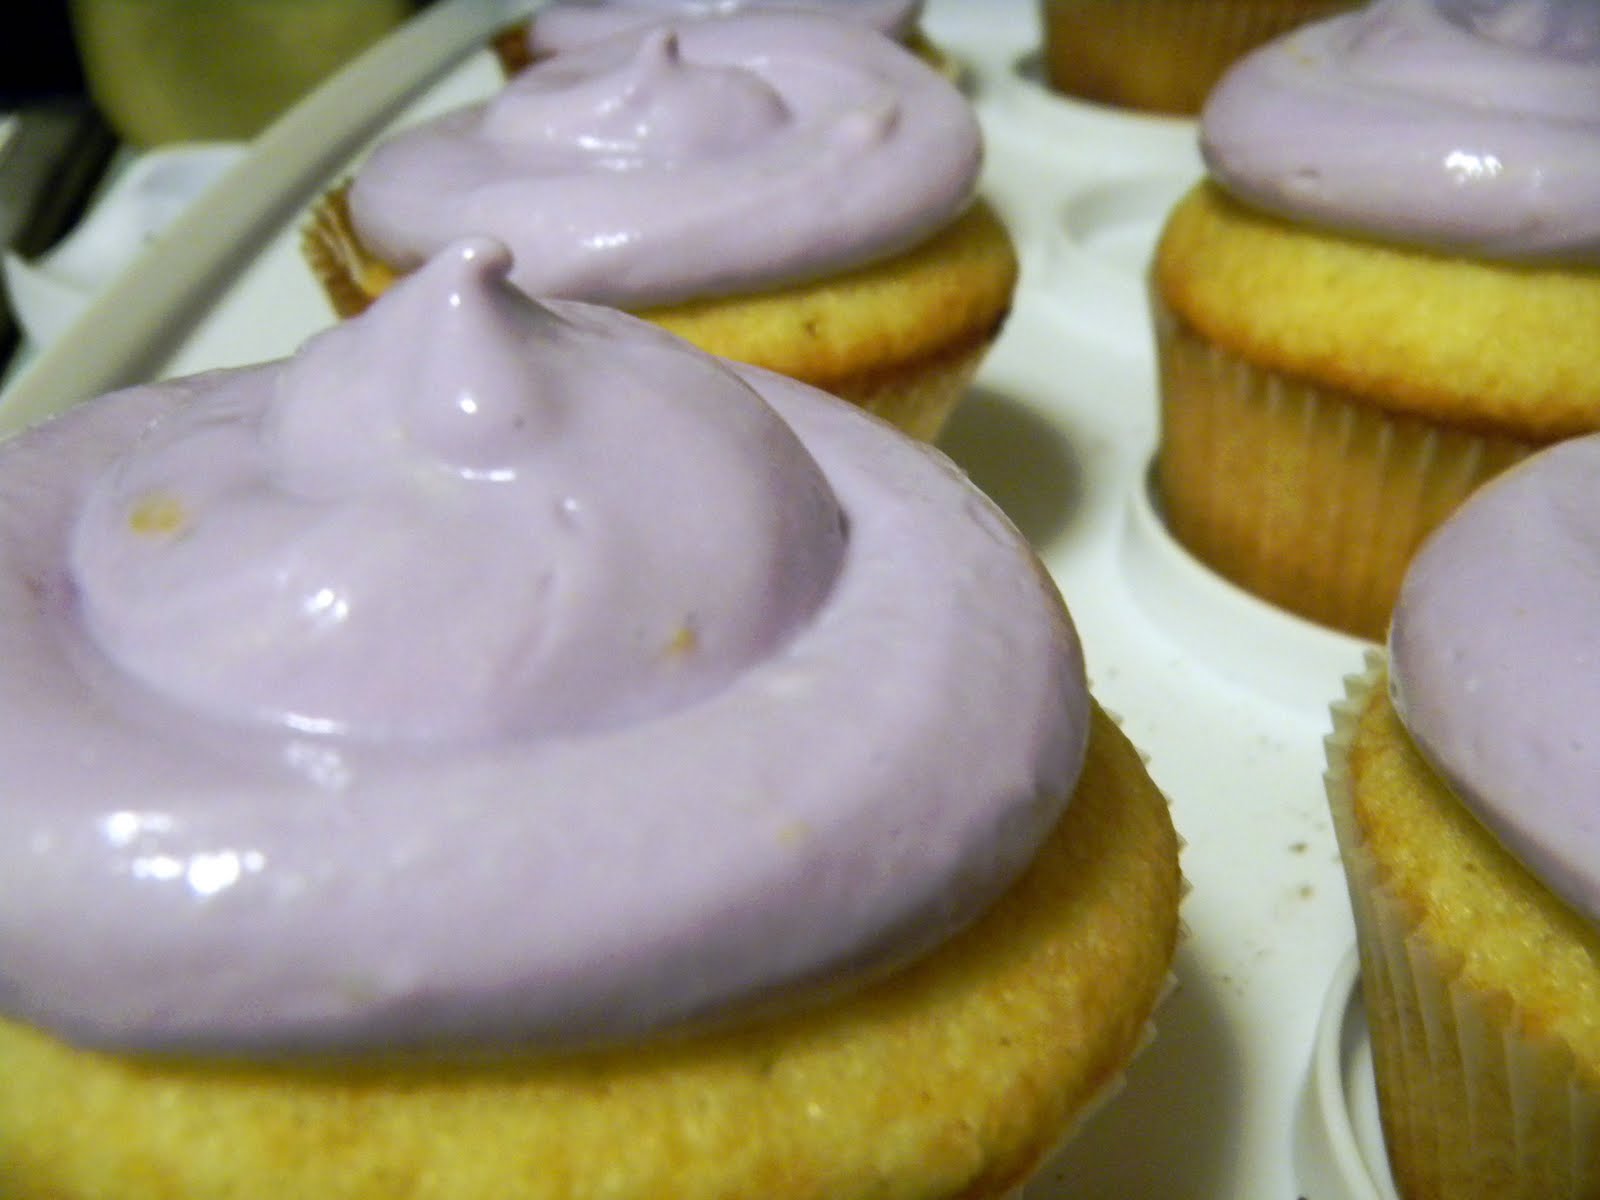
For my room mates birthday the other day, I decided to make something new (surprise, surprise!) so I made Lavender Cupcakes with Citrus Cream Cheese Icing. Delish! Two of my room mates said it was their favorite cupcake to date (and i've made a LOT!)

Here are the recipes and some pictures!

Lavender Cupcakes - from here*
makes 12 cupcakes. clearly, i doubled the recipe :)

  • 1/2 cup granulated sugar
  • 1/4 teaspoon dried lavender flowers
  • 1/2 cup butter, at room temperature
  • 2 eggs
  • 1 cup self-rising flour (how-to make yourself, here*)
  • 2 tablespoons milk
Preparation:
  • Preheat the oven to 350°F; line a 12 count muffin pan with paper liners.
  • Put the sugar and lavender flowers in a food processor. Process briefly to combine.
  • Tip the lavender sugar into a bowl with the butter and beat together until pale and fluffy.
  • Beat the eggs into the butter mixture, one at a time, then sift in the flour and fold gently. Stir in the milk, then spoon the mixture into the muffin cups.
  • Bake for about 18 minutes until risen and golden and a skewer inserted in the center comes out clean, then transfer to a wire rack to cool.

1. mixing the batter. 2. placing in cupcake tins. 3. making the icing with lots of zest! 4. adding the color!


Citrus Cream Cheese Icing - from here*
for 12 cupcakes. clearly, i doubled the recipe. :)

1/2 stick butter
1 8oz packages of cream cheese
1/2 teaspoon mixed citrus zest (from lemons, limes, oranges, whatever citrus you have)
1 teaspoon citrus juice (same as above)
2 cups confectioner’s sugar
3-4 drops of purple food coloring

1. soften butter in the mixer on high speed
2. add cream cheese and beat until combined
3. sift confectioner’s sugar
4. add about half of the confectioner’s sugar and citrus juice and zest to the butter/cream cheese mixture and beat on high speed to combine
5. add remaining confectioner’s sugar in stages until desired consistency and sweetness is achieved
6. add purple food coloring and mix until consistent color is achieved


haha funny thing, she actually turned 23. what shitty friends we are....eeeeks.but we did make it all look adorable for when she came home!

Thursday, March 25, 2010

Amy Atlas obsessed

if only i had the idea first! Sweet Treats, Dessert Tables, Event Design, galore! She is perfection.

Look at these adorable DIY Yarn Egg Decorations!! precious!! I want to hang them around my house in pastel/spring-y colors for a fun punch of seasonal color in our house!
if you are as inspired as i am, check out the how-to here*

Tuesday, March 23, 2010

A Spring Engagement!

no, not me people!

My friend Erin got engaged to the LOVE OF HER LIFEEE this past weekend in NYC! I am so excited for her and wish her the very best in the years to come!

she knows that I am a tad obsessed with weddings - but let me preface the rest of this post with "I swear I'm not usually this creepy"

girl - i picked out your inspiration board colors. sorry bout it.

Spring:
because you are SUCH a beautiful, glamorous DEEEEEEEV - this would look absolutely beautiful, I'm also thinking a touch or two the palest pink/peach.
Summer:
This color palette would look absolutely GORGEOUS if she were to have a summer wedding - her strawberry blonde hair and fair-ish skin tone would look absolutely stunning with these colors. Seriously, I'd die and go to heaven if she decided against her already decided October wedding.

Fall:
I went for glamour, because seriously, Erin is glamorous. I also went two COMPLETELY different routes because they both wanted to be chosen so badly that I couldn't choose! The first - sepia and gold - perfect for fall, while still including the girly side of pink. The second - a "playground" - Erin is SO fun and this color palette can be fun and whimsy and still have plenty of vintage glam.

Winter:
Dear G-d, I can picture the prettiness already. This two tug at my heart strings because of their amazing-ness. Just so simple and delicate!


So there you have it. I am officially wedding obsessed. Erin, don't be mad at me/think i'm SO weird/be scared that i'm stalking you*

(photo credits - snippet&ink)

Monday, March 22, 2010

Parisian Macarons, part two


a few more pictures for you! :)


piped and ready to go!


after about 13 mins in the oven!


SO SHINY!


a bit overcooked, but AMAZING either way!

EPIC SUCCESS: Parisian Macarons

oooooh friends, yesterday was the best day of my life! not only was the weather A-MAZING, but i had a little kick in my step (that may or may not have been due to sangria consumption) that led to the most perfect little macarons i have ever laid my eyes on!

*now, i know you remember my epic fail in the fall. i've had my sights set on the perfect macaron since, and i am very proud to say that this was only my second try! and they.were.perfect!!!

While I could take the time to write down the steps, I don't want to. I want to introduce you to the best book I've ever read: I {heart} Macarons by Hisako Ogita. Not only is it filled with plenty of eye candy, it gives you options for millions of flavors of macarons and buttercreams as well as other fillings. it also gives you step by step instructions - with pictures - which i obviously needed. Seriously, this book was my life saver!

without further ado, i present to you the most adorable little dessert i've ever seen, made by: ME!
while i am not thrilled with my color choice (only made two batches in fear that i'd royally screw up again), i am PUMPED about the results!

brownish color = plain almond/vanilla buttercream
green color = matcha (green tea....with hints of blueberry)/vanilla buttercream

every single person said: "seriously? you made these? are you sure you didn't buy them when no one was home!?!?!?? THEY LOOK LIKE THEY ARE FAKE!"
needless to say, I LOVE reactions like that!

i forgot to mention that i SCREAMED out loud when i saw the feet forming - so much so that my room mates that were home all came into the kitchen to see if i was ok/dead. it was THAT exciting!

Friday, March 19, 2010

Happy Easter!

Easter Desktop background:


click on the picture and it will open a new window, then right click and save to desktop background :)

Irish Car Bomb Cupcakes


Guinness Cupcakes + Baileys Chocolate Ganache Filling + Baileys Buttercream = the fatty's version of the Irish Car Bomb!

I made these little delights in honor of my good friend Albert's birthday because because it was just St. Patty's Day! Perfect!

Due to strict instructions from Michelle, this is a picture-packed post that is sure to crash your internet browser...haha!

Irish Car Bomb Cupcakes
- adapted from Annie Eats :)
Yield: 24 cupcakes
Ingredients:
For the Guinness chocolate cupcakes:
1 cup stout (Guinness)
16 tbsp. unsalted butter
¾ cup unsweetened cocoa powder
2 cups all-purpose flour
2 cups sugar
1½ tsp. baking soda
¾ tsp. salt
2 large eggs
2/3 cup sour cream
For the Bailey’s ganache filling:
8 oz. bittersweet chocolate, finely chopped
2/3 cup heavy cream
2 tbsp. butter, at room temperature
2 tsp. Bailey’s Irish cream
For the Bailey’s buttercream frosting:
8 tbsp. unsalted butter, at room temperature
3-4 cups confectioners’ sugar, sifted
4-8 tbsp. Bailey’s Irish cream
Directions:
To make the cupcakes, preheat the oven to 350° F. Line two cupcake pans with paper liners. Combine the stout and butter in a medium saucepan over medium heat. Add the cocoa powder and whisk until smooth. Remove from the heat and allow to cool slightly.
In a large mixing bowl, combine the flour, sugar, baking soda and salt. In the bowl of an electric mixer fitted with the paddle attachment, beat together the eggs and sour cream to blend. Add the stout-butter mixture and beat just to combine. Mix in the dry ingredients on low speed just until incorporated. Divide the batter evenly between the cupcake liners, filling them about 2/3 to ¾ full. Bake until a toothpick inserted in the center comes out clean, about 17 minutes. Allow to cool in the pan for 5-10 minutes, then transfer to a wire rack to cool completely.

To make the ganache filling, place the chocolate in a heatproof bowl. Heat the cream in a small saucepan until simmering, then pour it over the chocolate. Let sit for one minute and then whisk until smooth. If the chocolate is not completely melted, place the bowl over a double boiler or give it a very short burst in the microwave (15-20 seconds). Add the butter and Bailey’s and stir until combined.


Set aside to let the ganache cool until it is thick enough to be piped. (You can use the refrigerator to speed the cooling process, but be sure to stir every 10 minutes or so to ensure even cooling.) Meanwhile, cut out a portion from the center of the cupcake using the cone method (a small paring knife works best for this). Once the ganache has reached the correct consistency, transfer it to a piping bag fitted with a wide tip and pipe it into the cupcakes.


To make the frosting, place the butter in the bowl of a stand mixer fitted with the paddle attachment. Beat on medium-high speed until light and fluffy, about 2-3 minutes. Gradually add the powdered sugar until it is all incorporated. Mix in the Bailey’s until smooth. Add more if necessary until the frosting has reached a good consistency for piping or spreading. Frost the cupcakes as desired. sprinkle with extra cocoa powder because it's PRETTY!


packed up and ready to go!! such little cutie pies!

Wednesday, March 17, 2010

Lucky Charms

Happy St Patrick's Day!!

watch out for little leprechauns! They're always after your lucky charms....


if that isn't the MOST creepy Halloween costume I've ever seen, then i don't know what is. from here.

I'll be celebrating the day (hungover as hell. thanks roomie dinner party) watching this video over and over again! IT COULD BE A CRACK HEADDDDDD!!

Monday, March 15, 2010

Ft. Lauderdale

I was in Ft. Lauderdale a few weeks ago for work and I took some great pictures of my view from The Ritz Carlton (more to come later on their AMAZING salad dressing....yes, I did ask for the recipe!!)


look at that blue ocean!! too bad the pictures are deceiving, the weather was TERRIBLE!

Girl Scout Cookies: Thin Mints

These were much easier than the Samoas I made. Unfortunately, I need to perfect the chocolate coating. I was so disappointed with the Ghiradelli chocolate that I used, that I didn't even take a picture of the final outcome. It was super strong and overpowered the delicious mint cookie. Next time, I'll use a less strong chocolate. :)

Homemade Thin Mints
2 1/4 cups all purpose flour
1/4 cup cornstarch
6 tbsp unsweetened cocoa powder
1/2 tsp salt
1 cup white sugar
1/2 cup butter, room temperature
1/3 cup milk (any kind)
1/2 tsp vanilla extract
3/4 tsp peppermint extract

In a small bowl, whisk together flour, cornstarch, cocoa powder and salt.
In a large bowl, cream together butter and sugar. With the mixer on low speed, add in the milk and the extracts. Mixture will look curdled. Gradually, add in the flour mixture until fully incorporated.
Shape dough into two logs, about 1 1/2 inches (or about 4 cm) in diameter, wrap in plastic wrap and freeze for at least 1-2 hours, until dough is very firm.
Preheat oven to 375F.
Slice dough into rounds not more than 1/4 inch thick - if they are too thick, they will not be as crisp - and place on a parchment lined baking sheet. Cookies will not spread very much, so you can put them quite close together.
Bake for 13-15 minutes, until cookies are firm at the edges. Cool cookies completely on a wire rack before dipping in chocolate.

Dark Chocolate Coating
10-oz dark or semisweet chocolate
1/2 cup butter, room temperature

In a microwave safe bowl, combine chocolate and butter. Melt on high power in the microwave, stirring every 45-60 seconds, until chocolate is smooth. Chocolate should have a consistency somewhere between chocolate syrup and fudge for a thin coating.
Dip each cookie in melted chocolate, turn with a fork to coat, then transfer to a piece of parchment paper or wax paper to set up for at least 30 minutes, or until chocolate is cool and firm.
Reheat chocolate as needed to keep it smooth and easy to dip into.

Makes 3 1/2-4 dozen cookies.


The cookies taste exactly like the middle of thin mints, and like I said, I am going to have to experiment with the coating! :) Enjoy!

Girl Scout Cookies: Samoas


Home-made Samoas! Just as hard to make as they sound! :)

Homemade Samoas (a.k.a. Caramel de-Lites)
Cookies
1 cup butter, soft
1/2 cup sugar
2 cups all purpose flour
1/4 tsp baking powder
1/2 tsp salt
1/2 tsp vanilla extract
up to 2 tbsp milk

Preheat oven to 350F.
In a large mixing bowl, cream together butter and sugar. Mix in flour, baking powder and salt at a low speed, followed by the vanilla and milk, adding in the milk as needed to make the dough come together without being sticky (it’s possible you might not need to add milk at all). The dough should come together into a soft, not-too-sticky ball. Add in a bit of extra flour if your dough is very sticky.
Roll the dough (working in two or three batches) out between pieces of wax paper to about 1/4-inch thickness (or slightly less) and use a 1 1/2-inch cookie cutter to make rounds. Place on a parchment lined baking sheet and use a knife, or the end of a wide straw, to cut a smaller center hole. Repeat with remaining dough. Alternatively, use scant tablespoons of dough and press into an even layer in a mini donut pan to form the rounds.

(Sidenote: THIS SUCKED ASS. I'd suggest just forming the dough into a log and freezing it. The circles in the middle are pointless for this cookie, you'll be better off - and more sane - without them. just slice the dough once its firm. seriously.)


Bake cookies for 10-12 minutes, until bottoms are lightly browned and cookies are set. If using a mini donut pan, bake for only about 10 minutes, until edges are light gold.
Cool for a few minutes on the baking sheet then transfer to a wire rack to cool completely.

Topping
3 cups shredded coconut (sweetened or unsweetened)
12-oz good-quality chewy caramels
1/4 tsp salt
3 tbsp milk
8 oz. dark or semisweet chocolate (chocolate chips are ok)

Preheat oven to 300. Spread coconut evenly on a parchment-lined baking sheet (preferably one with sides) and toast 20 minutes, stirring every 5 minutes, until coconut is golden. Cool on baking sheet, stirring occasionally. Set aside.

Unwrap the caramels and place in a large microwave-safe bowl with milk and salt. Cook on high for 3-4 minutes, stopping to stir a few times to help the caramel melt. When smooth, fold in toasted coconut with a spatula.
Using the spatula or a small offset spatula, spread topping on cooled cookies, using about 2-3 tsp per cookie. Reheat caramel for a few seconds in the microwave if it gets too firm to work with.

While topping sets up, melt chocolate in a small bowl. Heat on high in the microwave in 45 second intervals, stirring thoroughly to prevent scorching. Dip the base of each cookie into the chocolate and place on a clean piece of parchment paper. Transfer all remaining chocolate (or melt a bit of additional chocolate, if necessary) into a piping bag or a ziplock bag with the corner snipped off and drizzle finished cookies with chocolate.
Let chocolate set completely before storing in an airtight container.

Makes about 3 1/2-4 dozen cookies.


If i try to make these again, i'll most definitely be making the Samoa Bars instead :)

Saturday, March 13, 2010

Ginger Shrimp Pot Stickers with Spicy Peanut Dipping Sauce


I wanted to make a fun dinner for the boyf, and my sister and her room mate with the same name...the Clair/e's :)...so i decided on potstickers because really? they are awesome. and these were no exception!

without further ado.....here is the recipe!
i made a LOT more than it said....like usual.

Ingredients

  • Pot stickers:
  • 3/4 cup shredded green cabbage
  • 1/3 cup chopped green onions
  • 1/4 cup matchstick-cut carrots
  • 2 tablespoons chopped fresh cilantro
  • 1 tablespoon low-sodium soy sauce
  • 2 teaspoons minced peeled fresh ginger
  • 1 teaspoon dark sesame oil
  • 1/2 teaspoon salt
  • 1/2 pound cooked peeled small shrimp
  • Dash of hot sauce
  • 24 wonton wrappers
  • 2 tablespoons cornstarch
  • 1 tablespoon canola oil, divided
  • 1 cup water, divided
    Sauce:
  • 1/4 cup water
  • 1/4 cup peanut butter
  • 2 tablespoons low-sodium soy sauce
  • 1 1/2 tablespoons seasoned rice vinegar
  • 1 1/2 tablespoons chile paste with garlic (such as sambal oelek)
  • 1/2 teaspoon sugar
    Remaining ingredient:
  • Chopped green onions (optional)

Preparation

1. To prepare pot stickers, combine first 10 ingredients in a food processor; pulse 4 times or until coarsely chopped. Working with 1 wonton wrapper at a time (cover remaining wrappers with a damp towel to prevent drying), spoon about 1 1/2 teaspoons shrimp mixture into center of each wrapper. Moisten edges of dough with water; bring 2 opposite corners to center, pinching points to seal. Bring remaining 2 corners to center, pinching points to seal. Pinch 4 edges together to seal. Place pot stickers on a large baking sheet sprinkled with cornstarch.

2. Heat 1 1/2 teaspoons canola oil in a large nonstick skillet over medium-high heat. Add 12 pot stickers to pan; cook 2 minutes or until bottoms are golden brown. Slowly add 1/2 cup water to pan; cover and cook 4 minutes. Uncover and cook 3 minutes or until liquid evaporates. Repeat procedure with remaining 1 1/2 teaspoons canola oil, 12 pot stickers, and 1/2 cup water.

3. To prepare sauce, combine 1/4 cup water and next 5 ingredients (through sugar) in a small bowl, stirring with a whisk. Serve sauce with pot stickers. Garnish with chopped green onions, if desired.

Ginger Broccoli Slaw

Ingredients:

pre-packaged broccoli slaw
prepared ginger dressing

Preparation:

combine in a bowl :)


enjoy!